Latest Entries »

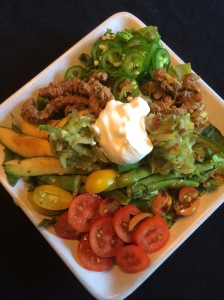
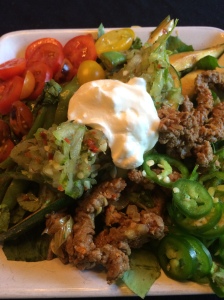
Garden Fajita Salad

IMG_3885

Produce is starting to come in from the garden. This is a really fun time of year, but challenging at the same time. Running to the grocery store with a list in hand is one thing- but creating a meal from the miscellaneous vegetables that trickle and gush into the kitchen is a whole different style of cooking. Wasting produce that you literally put your own sweat into growing is  horrible. I decided to try using some of the various items to create a fajita and loved it. Bonus side effect? The meat went much much further with all the various veggies on the plate. Below is what I did. Use this for inspiration and adjust based on what’s in your house or looks yummy to you!


Garden Fajita Salad

Fajita:

YIAH Fajita seasoning

YIAH Picante Olive Oil

1 lemon

 1 pound beef skirt steak

2 onions – sliced

1 pound green beans – frenched (slice in half from top to bottom)

2-3 squash/zucchini – sliced into thick matchsticks

Salad:

lettuce – washed and cut

tomatoes – cut to desired size

carrots – grated

Garnish:

jalapeno peppers – sliced, saute first if they are really spicy

sour cream

cucumber slaw (recipe below)

cheese


Drizzle meat lightly with Picante Olive Oil, fajita seasoning (1 tsp) and the juice from 1/2 the lemon. Mix thoroughly and set aside to marinate.

Mix onions, green beans and squash/zucchini. Drizzle with picante olive oil, fajita seasoning (.5 – 1 tsp) and the remaining lemon juice. Toss gently and set aside to marinate.

Get your skillet nice and hot and sear the fajita meat. Set aside and cook the veggies in the same pan. Slice the meat into about 1/2 inch slices. Be sure to cut perpendicular to the grain, or you will be chewing a very long time. (Think about it – you want to create a lot of short fibers, not a few long ones.) Toss with salad ingredients and top with garnish. YUM!


IMG_3887Cucumber Slaw

1 cucumber grated

1 Tbs YIAH salsa dip mix seasoning

1 Tbs lemon or lime juice

Combine ingredients and let sit for at least 30 min. Season with salt as needed.


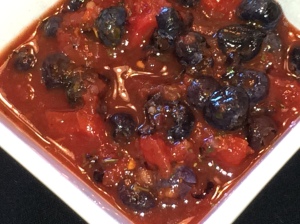
Blueberry Salsa

1- 15oz can fire roasted diced tomatoes

1 cup fresh or frozen blueberries

1-2  Tbs YIAH Salsa mix (dependent on heat preference)

1 lime, juiced

Mix all ingredients. Let sit for 30 min or longer. Blend 1/2 the mixture to make a less chunky salsa. Enjoy!

IMG_2180

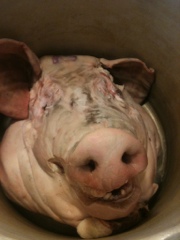
Say “head cheese”

Like “Julie and Julia” there is a whole list of culinary “to do’s” that I want to accomplish in my lifetime. Granted, they are a little different- but the thought makes my heart pump a little faster. Since most of them are centered around a lost skill or art, alot of them involve offal meats. In case you didn’t know – offals (pronounced, ironically enough, “awful”) are the organs and other “odd bits”. Well I can now check one off my list. I have officially made headcheese. It was slightly intimidating, and definitely a bit awkward- but overall a success!

20120216-023432.jpg

I’ll post a recipe in the future. I want to play with the spices first a bit. Although very meaty – my first attempt was a bit bland once chilled. Seasonings often become more mild when an item is chilled or frozen. Our favorite way to eat it was fried though! No breading necessary. Just a hot cast iron skillet, and a thick slice of cold head cheese!

Here’s some photos of what’s happening in my

kitchen…..

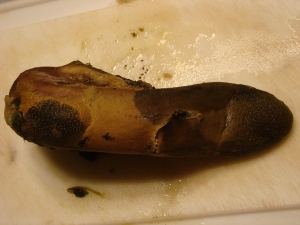
Cooking beef tongue has become quite frequent around here!

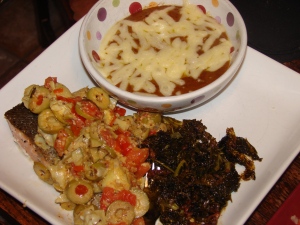
Salmon with an olive tapenade

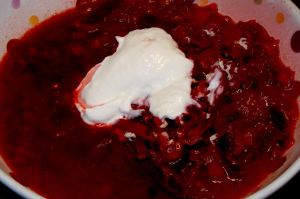
Borscht

This recipe is sooo wonderful, hot or cold! It’s slightly sweet and quite refreshing. I love to top it with freshly grated or prepared horseradish. If you are not a horseradish fan- you can skip that part.

1/2 cup dried mushrooms (I used shiitake)

4 cups chicken stock

4 tbs schmaltz (chicken fat- sub butter if you don’t have schmaltz )

2 large leeks – cut into 1/2 in pieces

1  large onion – finely diced

1 large carrot – 1/4 inch dice

3 pieces of celery – 1/2 inch dice

2 turnips- about 2 pounds – 1/4 inch dice

finely chopped parsley – chopped

3 cups shredded green cabbage

3 bay leaves

7 cloves garlic – minced

salt and pepper

1 1/2 pounds beets – match-sticked

1 1/2 cups canned diced tomatoes

4 Tbs red wine vinegar

Heat the broth until a gentle boil. Add the dried mushrooms and set aside.  Let soak until soft- at least 20 minutes.

Heat the schmaltz up in a heavy pan. Add onions and leeks. Sautee until soft. Add turnips, carrots, celery, and bay leaf. Saute until soft- about 10 min.  Strain the mushrooms, reserving the broth. Chop the mushrooms and add them to the other vegetables. Add garlic, cabbage and about 1 Tbs of salt. Cook for another 10 minutes.

Add beets, and tomatoes. Add the strained stock. Simmer for another 25 minutes, until all veggies are tender. Check for salt and pepper. Stir in the vinegar.

Serve with sour cream, and horseradish. Can be served warm or cold


My kids loved it so much- that when i went to take a picture- a little hand snuck into the photo frame! Even though she had a bowl in front of her- she wanted to grab a little extra!


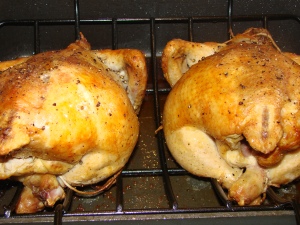
How to roast the perfect chicken!

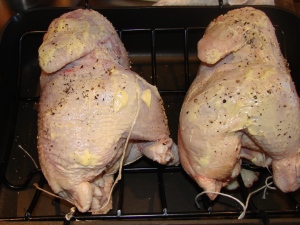
My favorite culinary professor taught me this technique. It’s a little fussy- but I’m yet to have it let me down. I LOVE a perfectly roasted, crispy skinned chicken. If you do too- here’s the guide to accomplishing it! The key to getting a beautiful crisp color is steady heat. With that in mind- you need to work as quickly as possible when changing the position of chicken and basting it. In and out – quick as a whip so it does not cool down between steps.

1. Brine your chicken – 1 cup of salt to 1 gallon of water. Allow to brine for 2-3 days before roasting.

This is completely optional. It’s great for making sure you don’t end up with a dry chicken. The brine keeps the bird moist even if it ends up over cooked a little.

Heat your oven to 450 degrees

2. Truss your chicken.

3.  Make a mixture for basting your chicken. A mixture of about 40% whole butter, and 60% clarified butter works best. Add salt and pepper and your spices of choice. Tarragon works well

.

4. Once trussed – place your chicken in a roasting pan with a rack. Lay it on its side. Baste- and the place in the oven.

5. Roast 5 min, then flip the chicken to the other side. Baste.

6. Roast 5 min on the second side. Flip the chicken to breast side up. Baste.

7. Roast the chicken breast side up for 5 min. Turn the oven down to 350 degrees

8. Roast the chicken breast side down for 30 min (baste 1/2 way through)

9. Roast chicken breast side up for the last 15 minutes (or until finished). Chicken should register 165 degrees internally with a thermometer.

Allow the chicken to rest for 10 min before carving. This allows the juices to settle back into the meat- and not run out all over the cutting board!

I love this cold soup. You have the refreshing chill of the mint- mixed with the biting heat of peppers. With a base of incredibly nutritious bone broth- it has a great depth of flavor. Hope you enjoy it too!

1 small, or 1/2 a large melon

1 large jalapeno – diced (remove seeds if you wish to reduce the heat)

1/4 tsp ginger – minced or microplaned

1/2 cup packed mint leaves

1/4 cup roughly chopped chives

4 cups chilled chicken bone broth

Salt and pepper to taste

1/2 cup grassfed cream

Combine first 5 ingredients in a blender. Puree. Add chicken broth, and season to taste. Add cream just before serving. Stores really well in the fridge too!

Bone Broth Challenge!

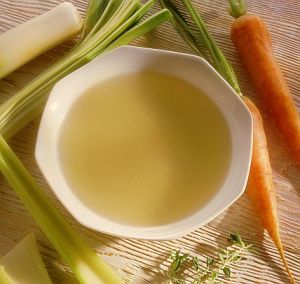
One of my favorite bloggers , Ann Marie- over at cheeselave, is having a contest. A bone broth challenge! Bone broth and gelatin how a multitude of health benefits. For the most part, here in America, we don’t eat NEARLY enough bone broth. This challenge is designed to motive, energy and excite you as you start incorporating broth into your daily diet! Go check it out! Whether you decide to participate or not- you will benefit from great ideas, and creative inspiration on how to effortlessly get more broth into your diet. PLUS- you could lose some cellulite along the way……don’t know what I’m talking about? Check it out here!


PIZZA!!!!

Pizza is a HUGE favorite food for my husband. What’s NOT a favorite, is the reaction he has after eating it. Increased inflammation, increased “seasonal allergies” and often flu like symptoms. This pizza was our answer to that dilemma

 Crust :

3 cups of cooked cauliflower – about 1 head

3 cups grated mozzarella cheese

5 eggs

5 Tbs coconut flour

Italian season

Grate cauliflower and saute in a dry pan. Once cooked, set aside and cool. Combine cooled cauliflower with cheese, eggs, and coconut flour, and any seasoning.

Place wax paper on a stoneware cookie sheet, and spread out to form crust. Bake in the oven @ 450 degrees for 15-20 minutes, until lightly browned.

Top pizza as desired, and place under a broiler to melt cheese. . Since the pizza will only be under the broiler for about 5 minutes, slice veggies super thin, or par cook them before topping the pizza.

ENJOY!

Texas Chili

I love a good chili. For the record- real chili- has NO beans. This is my chili. It’s a favorite around here. It has a very rich deep flavor, lots of spice, but not too much heat. Enjoy with plenty of sour cream and cheese! Like all chili’s – this one really taste best the day after it’s made. We cook it up a day before we plan on eating it, then I only have to reheat.


3 whole dried chipotle peppers

3 pounds chuck roast, 1 in cube

½ pound bacon

2 celery stalks- diced

3 carrots- diced

1 red onion – diced

1 yellow onion – diced

2 bell peppers- diced

4-6 medium jalapeno peppers- diced

20 cloves garlic- pressed

½ tsp cinnamon

½ tsp cloves

½ tsp allspice

1 tsp coriander

½ tsp cayenne

1 Tbs cumin

1 tsp ground ancho

1 tsp ground new mexico chili

1 28 oz can whole tomatoes

3 cups chicken bone broth

1 cup brewed strong coffee

2 Tbs kosher salt (or to taste)

1 pint beer

2 Tbs cocoa powder

½ cup masa harina (optional)

Suggested garnishes: cheese, sour cream, avocado, diced onions, diced jalapenos, cilantro


 On a dry cast iron skillet heat dried chipotle chili peppers. Remove from pan and add to almost boiling water (about 2 cups). Set aside

Render bacon, crumble and set the cooked bacon pieces aside. Brown the roast cubes, adding tallow or ghee to the bacon fat if more is needed. The roast will probably need to be browned in batches. Don’t over crowd the pan or you will “steam” rather than brown your meat. Set aside browned meat.

Adding tallow or ghee as needed, sauté the onions until translucent, about 10 minutes. Add carrots and peppers and celery, sauté 10 min. Add garlic, cooking just until fragrant. Add dried spices and sauté for a moment to release fragrance.

Take the soaked, dried chiles and puree in a blender with the soaking liquid. Add to the chili. Add tomatoes, smashing them well, to the pan. Add remaining ingredients except cocoa powder and masa harina. Add cubed beef and bacon crumbles to the pan. Simmer very low for 3-5 hours until meat is tender.

Once meat is tender, add cocoa powder and masa harina (if desired- it thickens the chili). Simmer on low for another hour. Garnish and enjoy!!!!